Thursday, 8 November 2012

Monochrome

Hi everybody.

A simple card today which I am not pleased with. I almost didn't post it but then decided that we can all make mistakes can't we? My lovely dad used to say "Even (Sir) Stanley Matthews had his  off days!" - a football fan as you will have gathered!


Click on image to enlarge picture

The papers once again were very old stock which I bought some years ago from a craft shop which was closing down. At least I am continuing to use old stash when I can. I matted the plaid paper onto the base card, matted the spotted paper onto plain and then cut them  into pennant shapes, after computer generating the sentiment. The stamp is one I won from Ladybug Crafts last month and I stamped it with an Anna Griffin green pigment ink then used a brush to fill in the background so it wasn't stark white. I think maybe this is what I don't like about it because I'm not good at it.

Anyway, for better or worse it's here.

Today I am off to the NEC and hopefully not spending too much money! ROFL!

Have a good day. Love from Christine xx

Tuesday, 6 November 2012

Love Came Down

Good morning fellow bloggers. For today's card I have used the Three Little Angels stamp from LOTV.


Click on image to enlarge picture

 I cur the cardstock to 5 x 7. After stamping the image I diecut it with Spellbinders Marvellous Squares. I coloured it with Promarkers and then added some stickles to the dresses. I computer generated the sentiment and diecut it with the smallest of the Resplendant Rectangles dies. The poinsettias are Marianne Creatables. I need to do something about the glitter. It looks better in real life but could be better. The backing papers are from my stash from years ago (I am determined that I will use my old stuff as much as possible) and the ribbon and gems are from my stash.

Well that's another one down, only about eighty to go!!

Have a great day everybody.  Love and hugs from Christine x


Monday, 5 November 2012

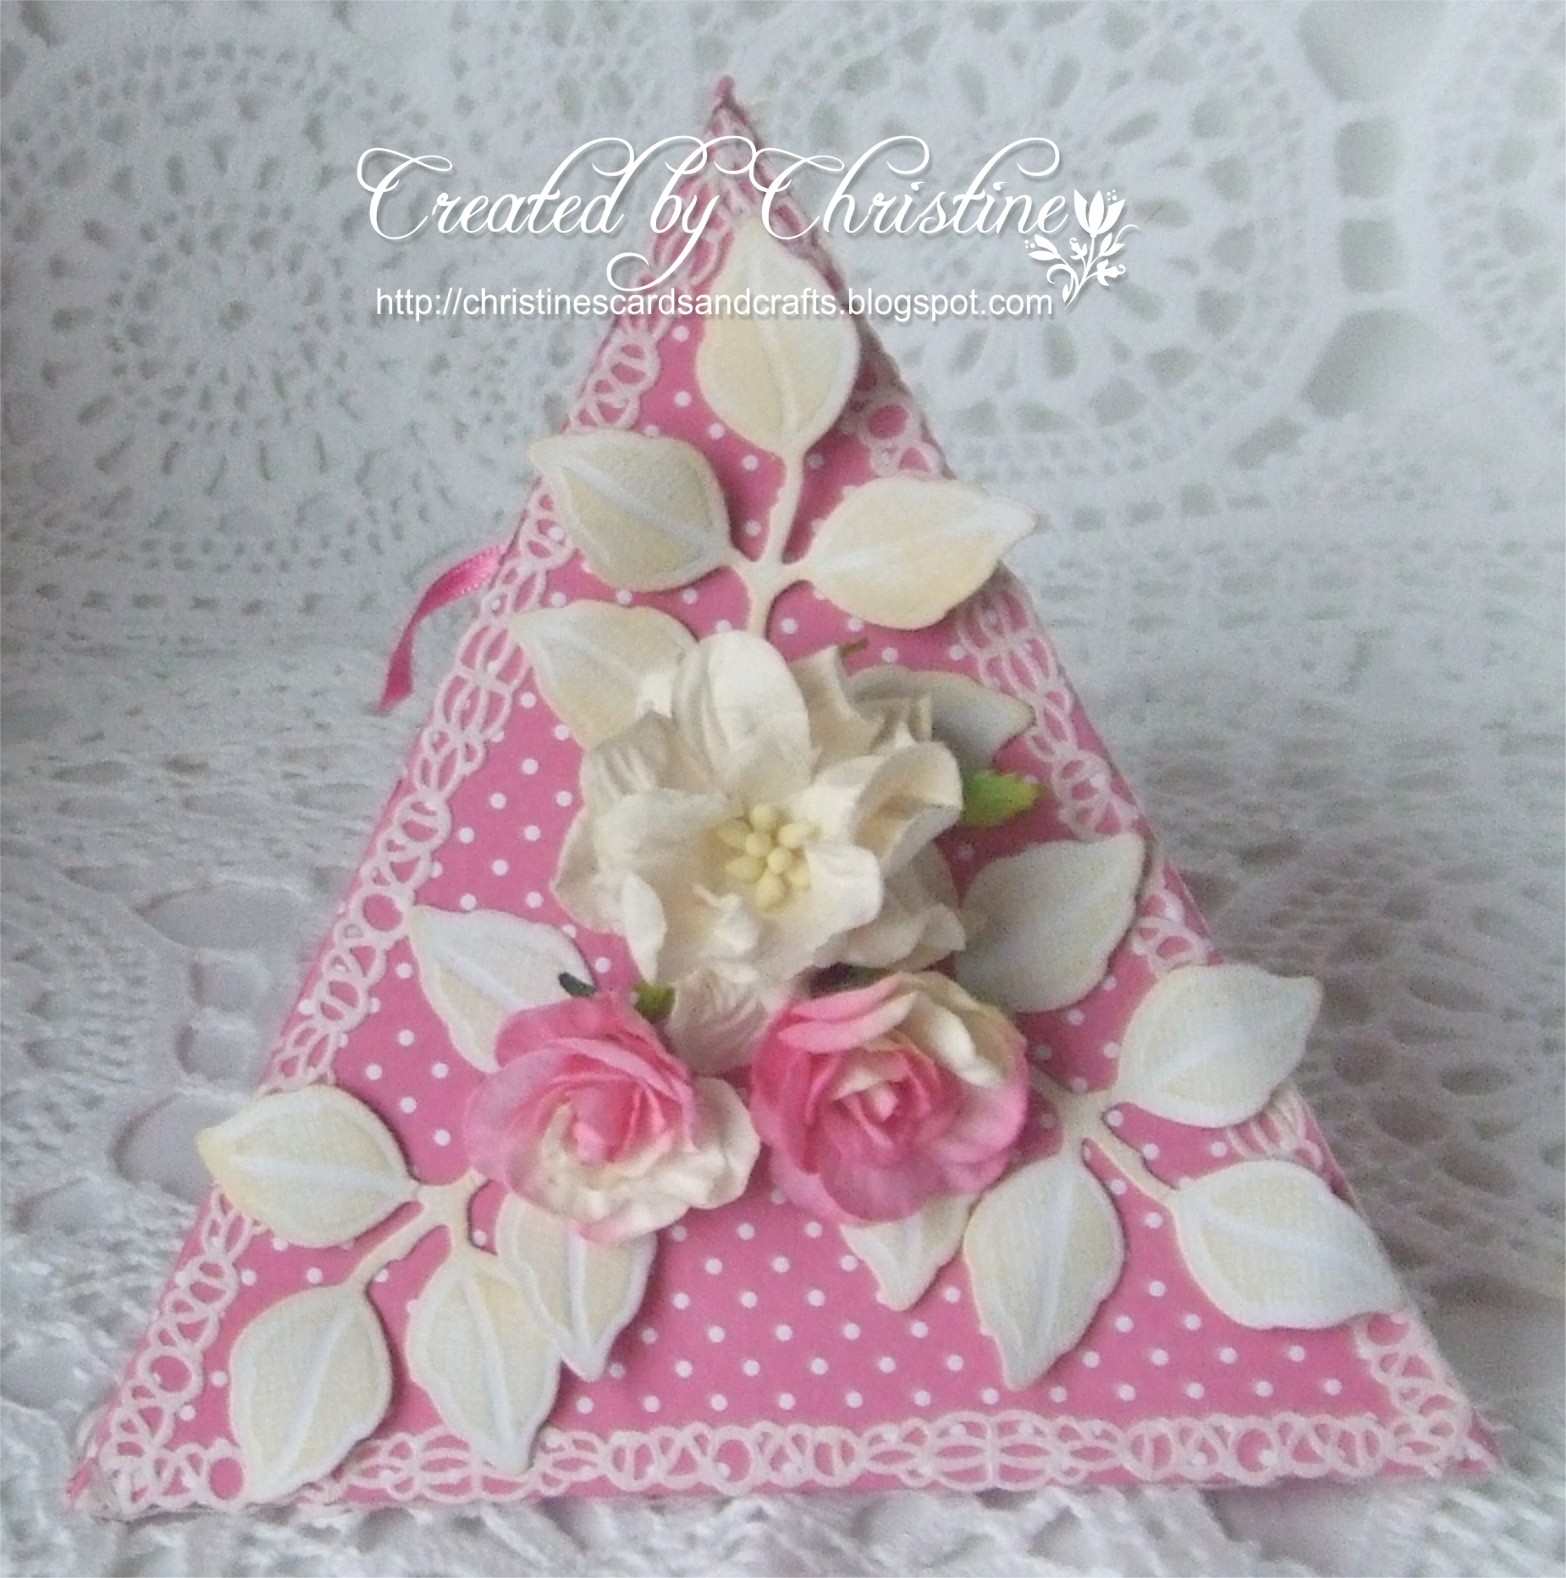
Triangular Box

Good morning friends. What happened to the weekend - now you see it, now you don't and it's Monday again already.  I was trawling through blogland and came across this tutorial  for an incredibly easy box which can be found HERE and I thought you might be interested.  You only need a piece of card 28 cms x 14 cms and it only takes a couple of minutes.  It would be ideal for small gifts and can be embellished as simply or elaborately as you wished.  I think I might be using these for my table gifts at Christmas.  By altering the size of the cardstock  you can easily make different sized boxes.  I only embellished one side on this box but you could easily do all three so I'm  going to play around with a few more.


Click on image to enlarge pictures.

Showing two sides and the ribbon fastening it.


Showing the side opening with some goodies inside.
I used pink spotted card and decorated the edges with paper lace that I bought absolutely ages ago from Lakeland before they stopped selling crafty stuff. What I hadn't realised is that it is self adhesive and when you remove the backing it is exactly the same as the paper lace so can be used too. Not bad since I came across it by chance when I was going through a box of stuff that had been in the back of a cupboard for a couple of years. Sorry, I'm waffling! Back to the box. I added a WOC gardenia and a couple of pink and cream roses from my stash but I don't know where I bought them from, and Spellbinders foliage. The triangle ties with a ribbon and the whole of one side opens to allow you to put in the gift or sweets or whatever.

Well that's  it for today.

Sunday, 4 November 2012

My Stocking's Already Full!

Hi  everybody, another Christmas card today.  Help!! I am starting to panic!! 

Click on image to enlarge picture


Another of these really cute LOTV images which I just love! Diecut with Spellbinders standard circles and scalloped circles, coloured with promarkers, glitter to the stocking tops and hat bobbles and dotted with liquid pearls for snow. I used a glitter glue pen on the actual stocking but it looks more effective in real life than in the picture. Once again I removed the yellow centres from the poinsettias and replaced them with a glittered sun punch out. The sentiment stamp was a magazine freebie and the background papers are Papermania Home For Christmas.  Red pearls are from Hobbycrafts. Quite a simple, clean-looking card really.

Well as you can see I am back into my crafting again. Let's hope nothing crops up over the next few days and I can get some Christmas cards made.

Have a good day everybody.

Love from Christine x

Saturday, 3 November 2012

New Home

Hello blog friends. Sorry about the confusion yesterday if you were trying to see this  post. As I scheduled it I had a senior moment and clicked on the wrong date and it published immediately. Ouch!  I'm sure there must be a way to rectify it but I couldn't find it, so in the end I just deleted  it and started again. Maybe one of you cleverer people knows the answer?

This is a card for my nephew who has just moved into his new home.

Click on image to enlarge card


Linda (Lindyloo) did a similar layout to this a few months ago on her blog Creative Harmony, which is where I remembered it from.  However, Linda's was beautifully feminine.  I used browns and blues and straight lines to maintain the masculine theme, and added a blue butterfly for a touch of whimsy.  Okay, I know the blue bow isn't so masculine but it's only a small one so I think I can be forgiven.  I computer generated the sentiment then used Spellbinders classic ovals to diecut the sentiment and co-ordinating mat.

Well that's it for me today. Hope you all have a good day and manage to find some time to craft.

With love from Christine xx


Friday, 2 November 2012

The Happy Couple

As I said, I have been so busy and not much time to craft  - sob! sob!  I made this card a couple of months ago but haven't shown it so I thought this was a good opportunity.

Click on image to enlarge picture.


It is actually a stepper card but unfortunately I had to scan it rather than photograph it so you cannot see the step effect. I used white card stock to cut the stepper base using my hougie board, and matted it with pink pearlescent paper. The pink backing papers are from a  wedding scrapbook pad, which I think might be Hot Off The Press. There are some very pretty green papers in it which I will be using at some stage because they don't look like wedding papers. The image is an LOTV topper with some glitter added to the flowers and the brides gown, although not visible, Spellbinders lacy circle and two layers of pink pearlescent card using Martha Stewart  double loop punch. The flowers, pearls and ribbon are from my stash.

My new printer came yesterday so it is all set up and ready to go. Here's hoping that it serves me as well as my last one which I had for eleven years with no problems at all. Mind you, nothing is made to last these days so it's doubtful!

Well have a good day everyone.  Christine xx


Thursday, 1 November 2012

Flower and Swirls

Good morning. I've been pretty busy and not had much time to craft. I did manage to make a very simple card which I thought I would show, made mostly from my bits box.


Click on image to enlarge picture.


I stamped a swirls stamp in versamark onto  a scrap of pink pearlescent paper and embossed it with white powder and mounted it onto silver mirri. The flower is just a couple of punched flowers and two punched maple leaves in green vellum.  I mounted it onto pink pearlescent cardstock and then used liquid pearls.  Very simple indeed.

Well I hope you all have a good day.

Love from Christine xx